TransferRIP: How to check for Updates
A lot of first time users of the TransferRIP software may not be aware of the FREE 6 month Update Plan which comes with new purchases of the software. Some of you may be asking, what is the update plan code – well, the update plan code not only activates the software, but also allows you to update the TransferRIP software to the newest version, with all the new tool, features, bug fixes and more.
We recommend that all users check for updates at least once a month. Unless you have registered to receive our newsletter, you will not hear about the latest updates to the TransferRIP software. So checking for updates on a regular basis is a good routine to get into.
This brings us nicely onto the reason for this tutorial – a lot of users have never checked for updates. Once the Update Plan expires, users will no longer be able to update the TransferRIP software to the latest version. If your update plan has expired, you can continue to use the TransferRIP software without purchasing a new update plan.
To purchase a new update plan, please contact us.
Below you will be walked through, exactly how to check for updates within the TransferRIP itself. Let’s get started!
Check for Updates
The first thing we need to do is check that there is an update available to download.
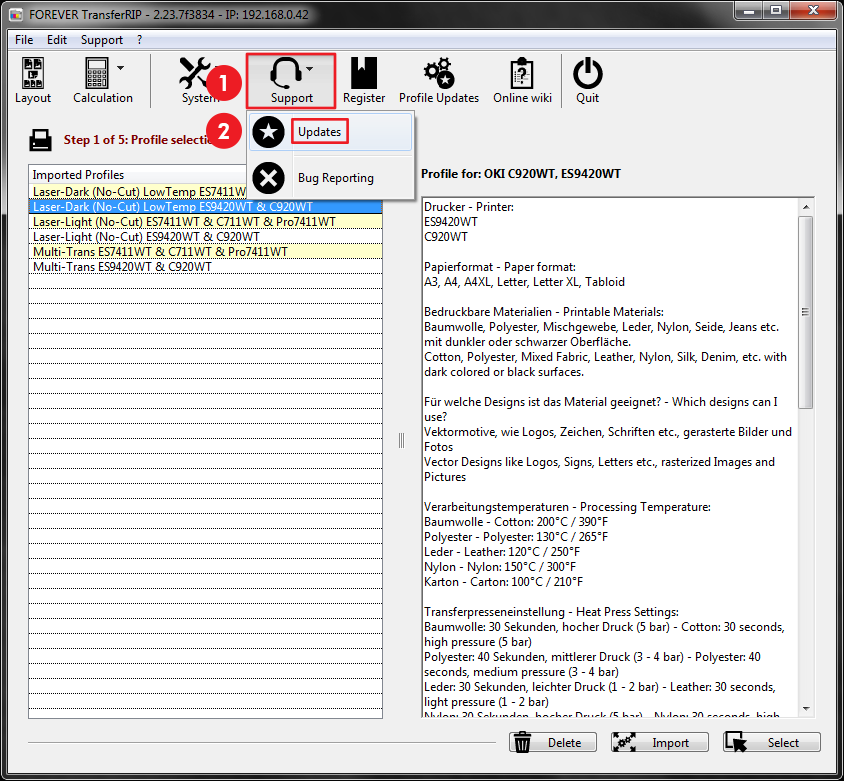
- Click “Support”
- Click “Updates”

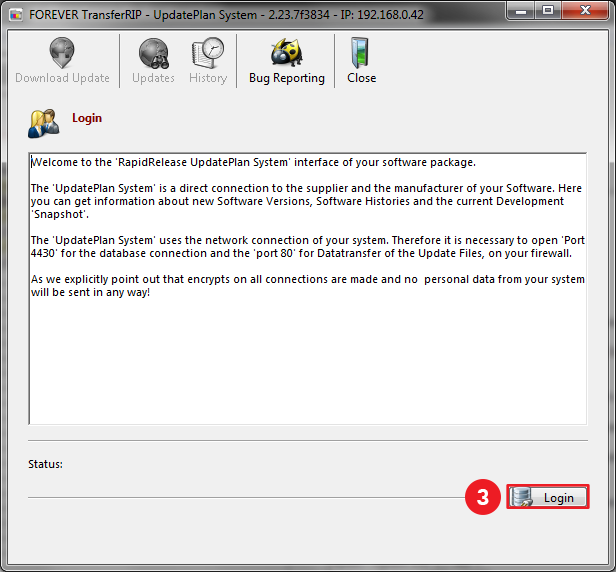
The next window to appear is the System login window. By clicking the Login button, you are connecting to the TransferRIP Update center. - Click “Login”

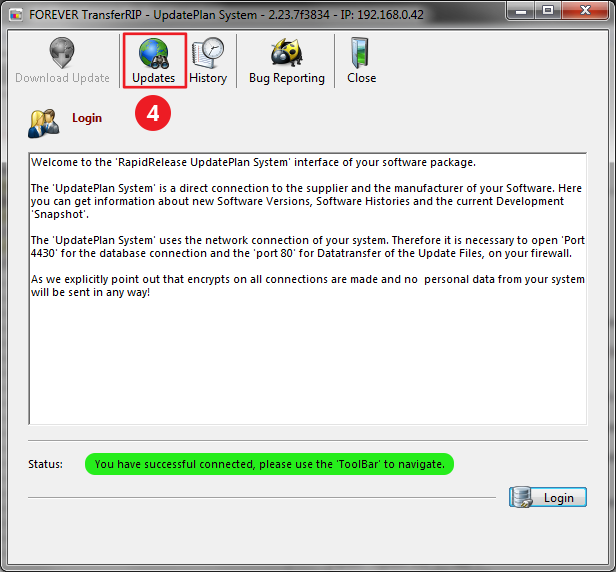
- Click the “Updates” button (once it becomes active)
After clicking the Login button at the bottom of the screen, the “Status” message will appear. At the same time, the “Updates” button at the top of the screen becomes active, making it clickable.
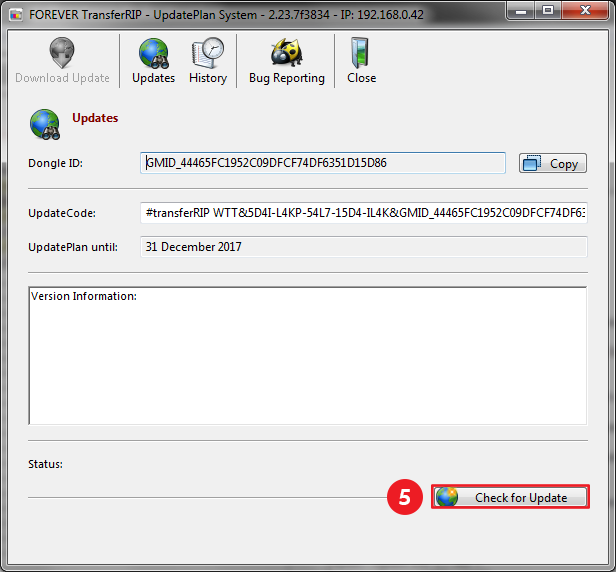
- Click “Check for updates”
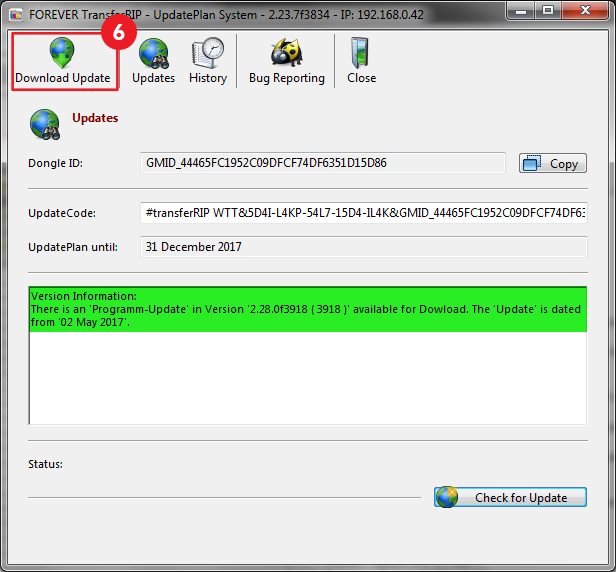
Note: If updates are available, then the “Download Update” button become active (see the below image).
- Click the “Download Updates” icon.

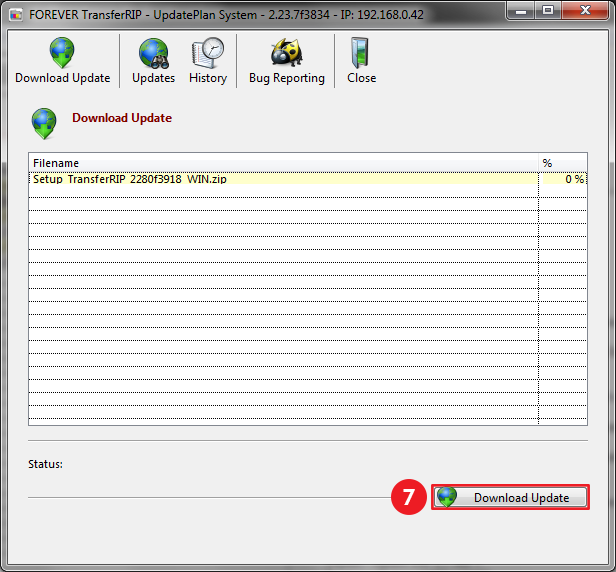
- Click the “Download Update” button
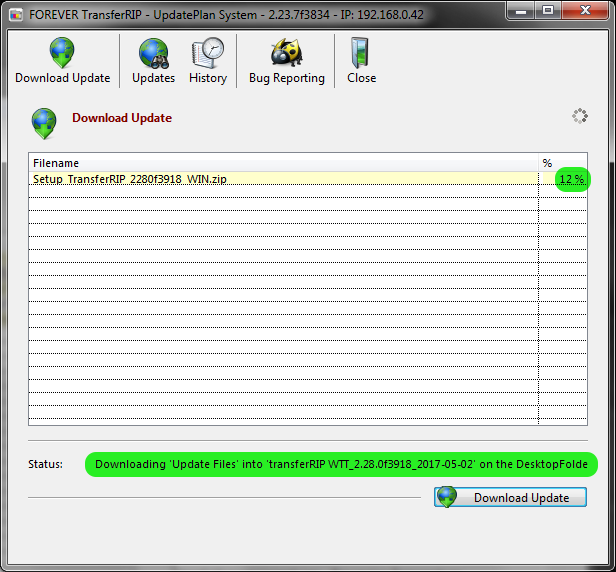
After clicking the “Download Update” button, the “Status” message becomes active, telling you exactly where the file will be saved. The progress of the download is also displayed at the side of the file in the download list. The download speed depends on the speed of your internet.
IMPORTANT: Once the download has finished, close the TransferRIP software.
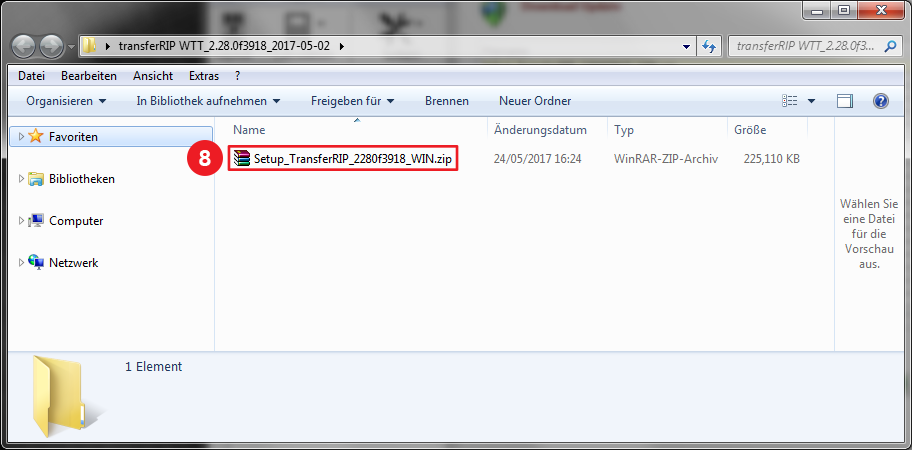
Once the download is complete, the folder which contains the ZIP file will open.

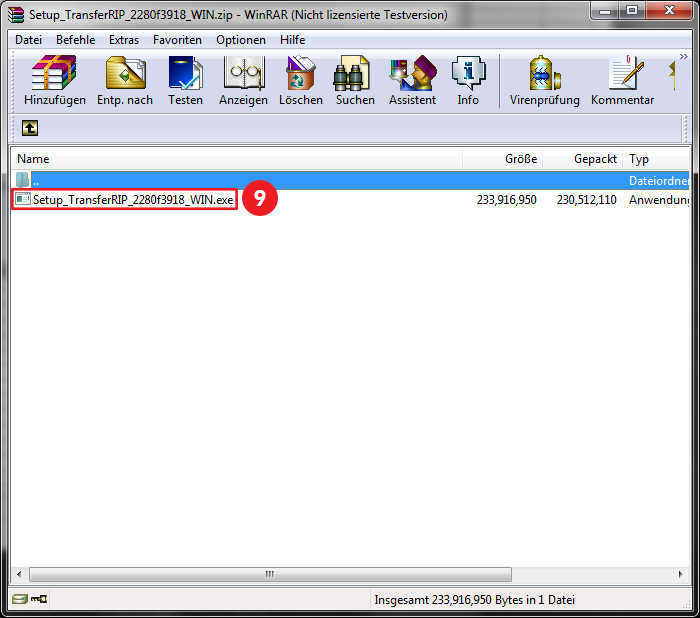
- Double-click the ZIP file.

- Once you have unzipped the file, Double-click the installation file and begin the installation process.
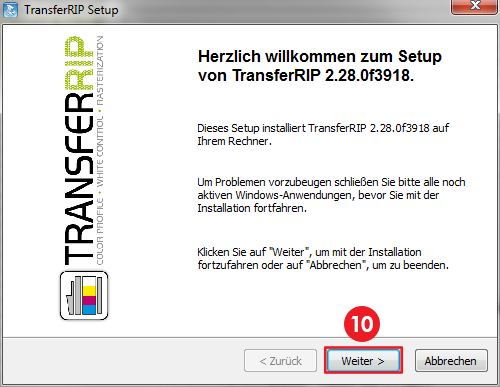
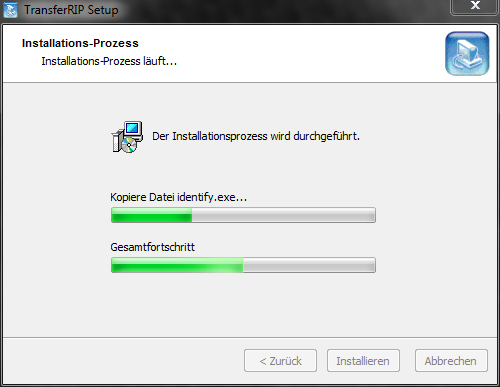
Follow the onscreen instructions to install the TransferRIP.
- Click “Next” to begin installing the TransferRIP Update.

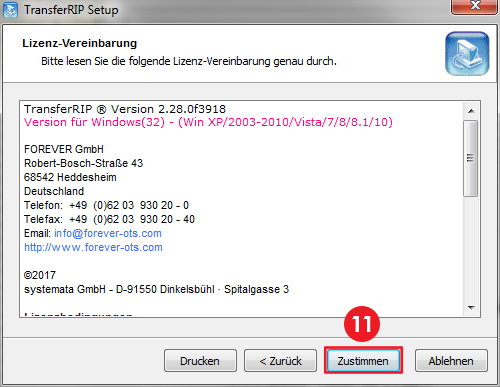
- Click “Agree” to accept the license agreement.


Final Thoughts
If your update plan has ran out, then a new update plan will need to be purchased. If this is the case, please contact one of our sales managers who will take you through the process of purchasing a new TransferRIP Update Plan.
If you found this Tutorial helpful, please leave a comment below. If you would like more tutorial like this, please let us know, either via our contact form or in the comments below.



Leave a Reply
Want to join the discussion?Feel free to contribute!